
Finally!!! My gardening guide is officially here! Since my little seedlings have officially grown up (and are all potted and thriving, some a bit too much actually like my mutant dill) I felt the way I presume most other parents do—bursting with advice to share with any would-be (plant) parents. Before you claim that you can’t keep any plant alive and definitely don’t have a green thumb, let me assure you that I for years killed every plant we brought into our place, but when I finally decided to just learn the basics and apply myself a bit, our place has gone from a plant death trap to a literal greenhouse now. So if I can do it, you certainly can. And honestly, having our place brimming with plant life has made me so happy—our air is cleaner, our space feels more cheerful and we have herbs on-hand whenever we need them! Oh, and we’re helping out our little wildlife friends: bees, hummingbirds, butterflies and many more.
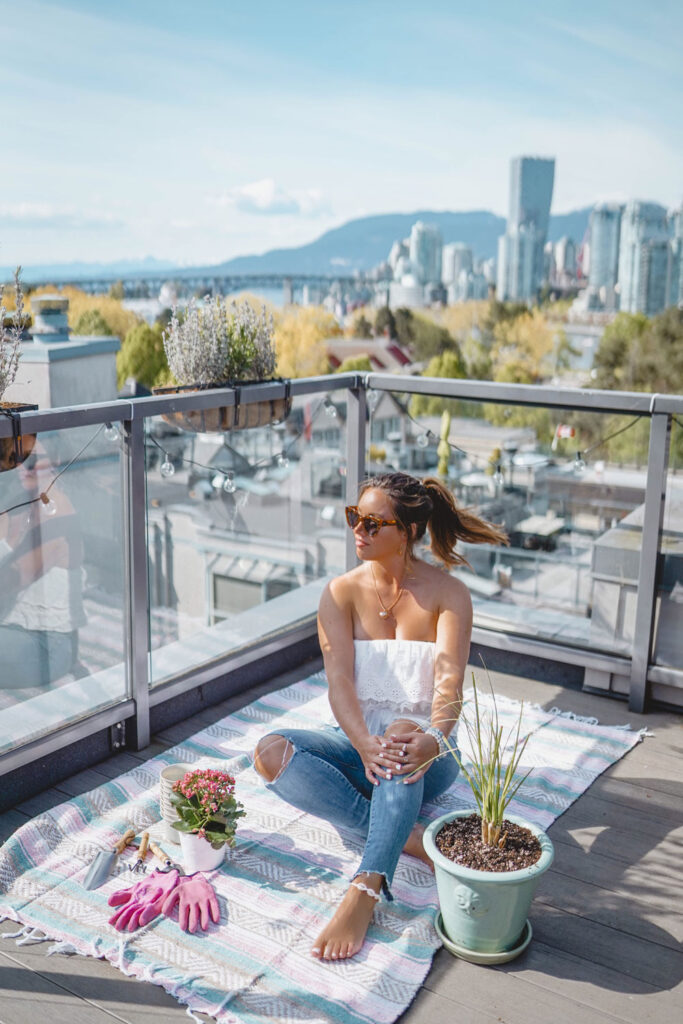
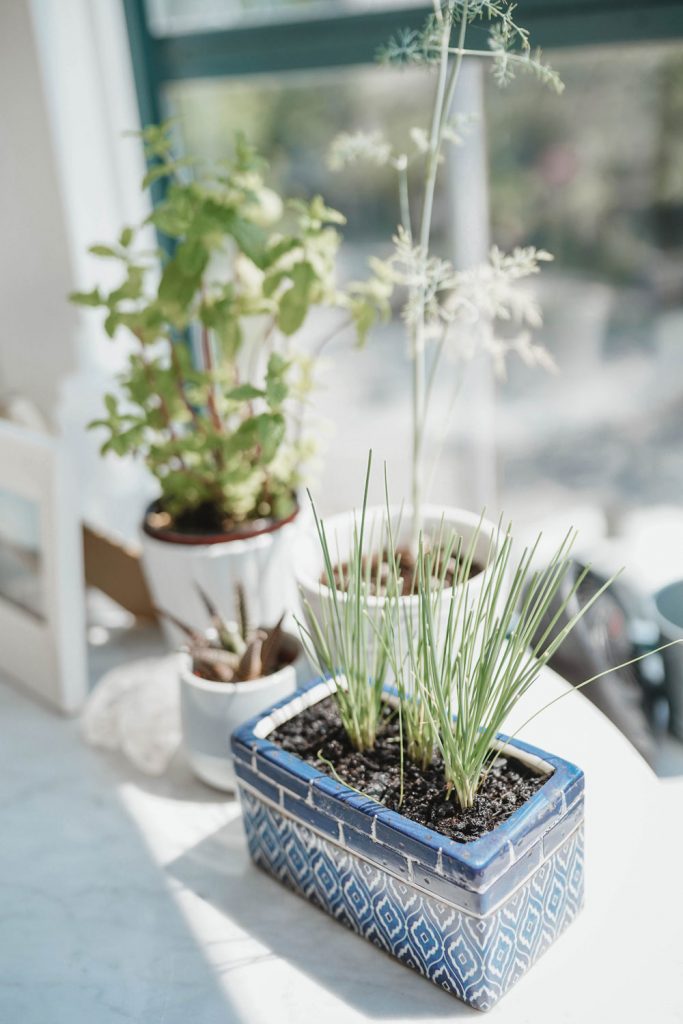
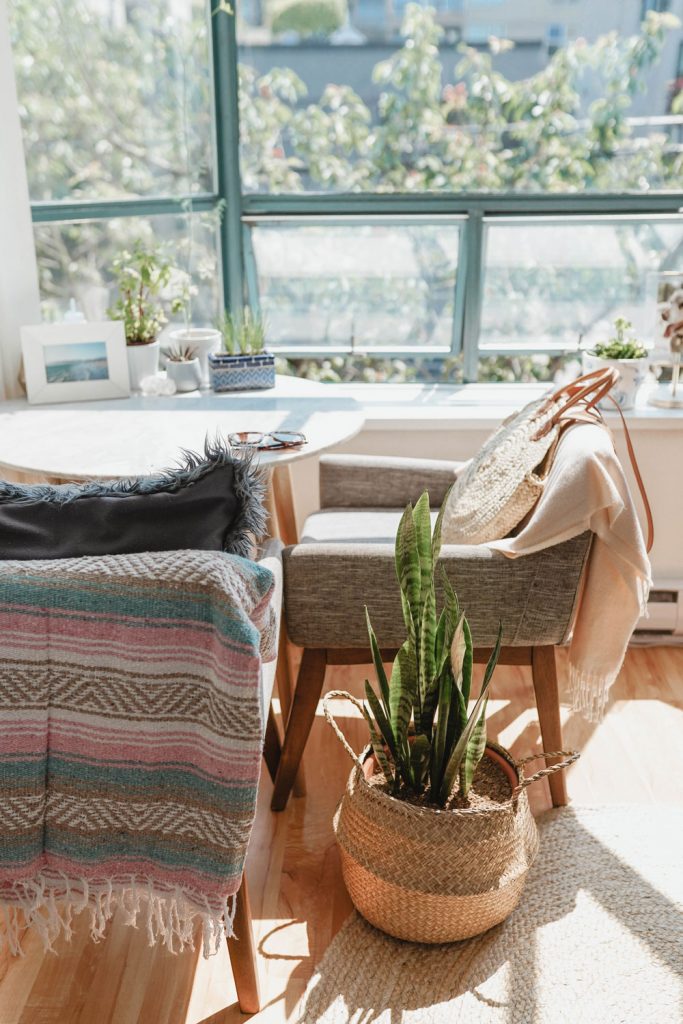
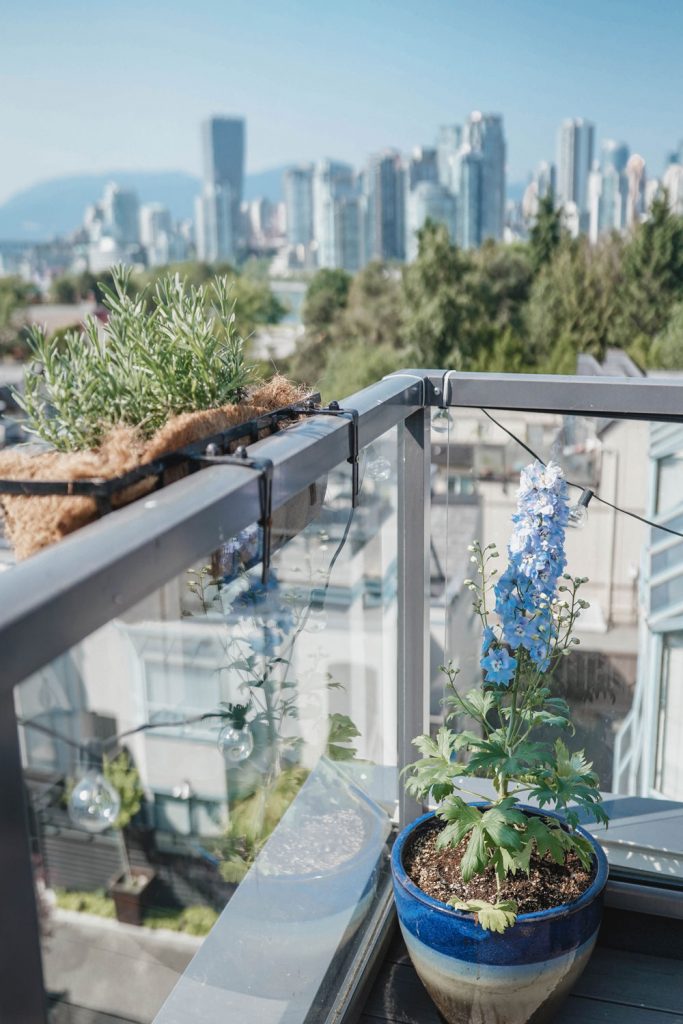
Now, this guide will be a bit more specific to urban gardeners because that’s what I am and I can’t unfortunately really speak to gardening in a plot of land (other than the teeny tiny plot my parents let me have at our cabin on the Sunshine Coast for my sunflowers). So I’m really confined to our 700 sq ft apartment (with the outdoor spaces as well, which we’re really lucky to have) but even without a plot of earth, I’ve managed to grow and care for a snake plant, sugar vine, mint, dill, chives, rosemary, delphinium, bamboo, pampas grass, 4 big planters filled with flowers and greenery (some of which I grew from seed, more on that in a second!), sunflowers both potted and in a big planter, lavender, kalanchoe, various cacti and about 2-3 other potted plants. It sounds like a lot but it’s really easy! Well, easy enough—it does take monitoring and you do have to care for them, but most urban gardening is pretty straightforward. So moving onto some of my tips!
Essential gardening terms
seedling, seed leaves, true leaves, transplanting, direct sowing, last frost, overwintering, deadheading
A Quick Glossary
Here are some basic terms you’ll need to know to throw lingo around like a pro.
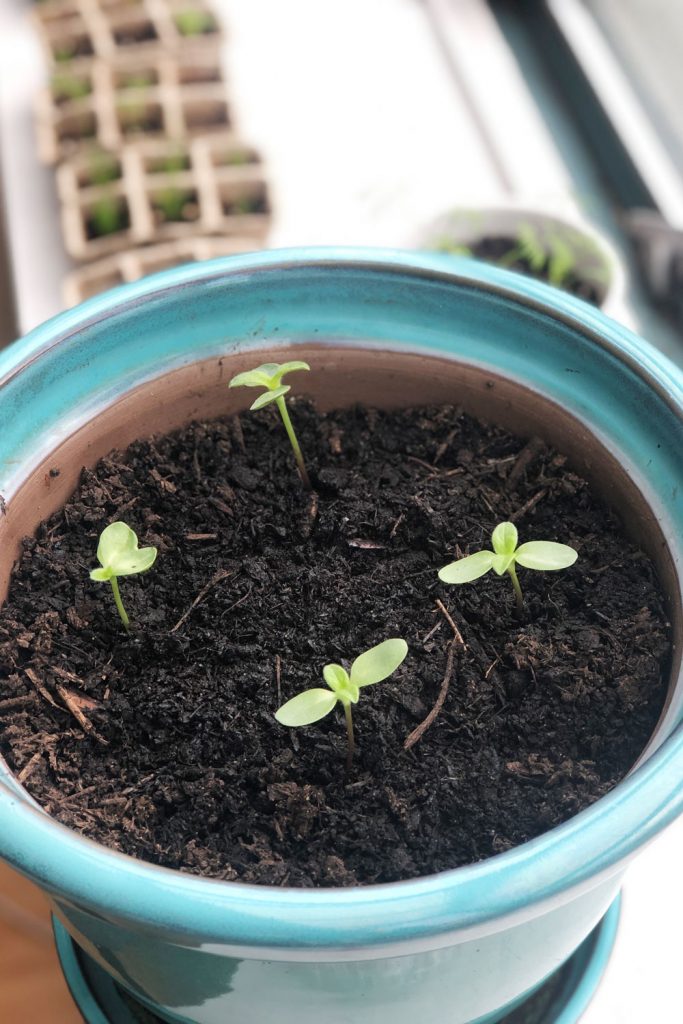
- Seedling: think of this as the baby stage between a seed and an actual plant. Seedlings require extra love – as a quick example, your plant might not require a lot of watering when it’s fully established (like a cosmos), but as a seedling they usually need a little extra TLC—more water, sun, nutrients.
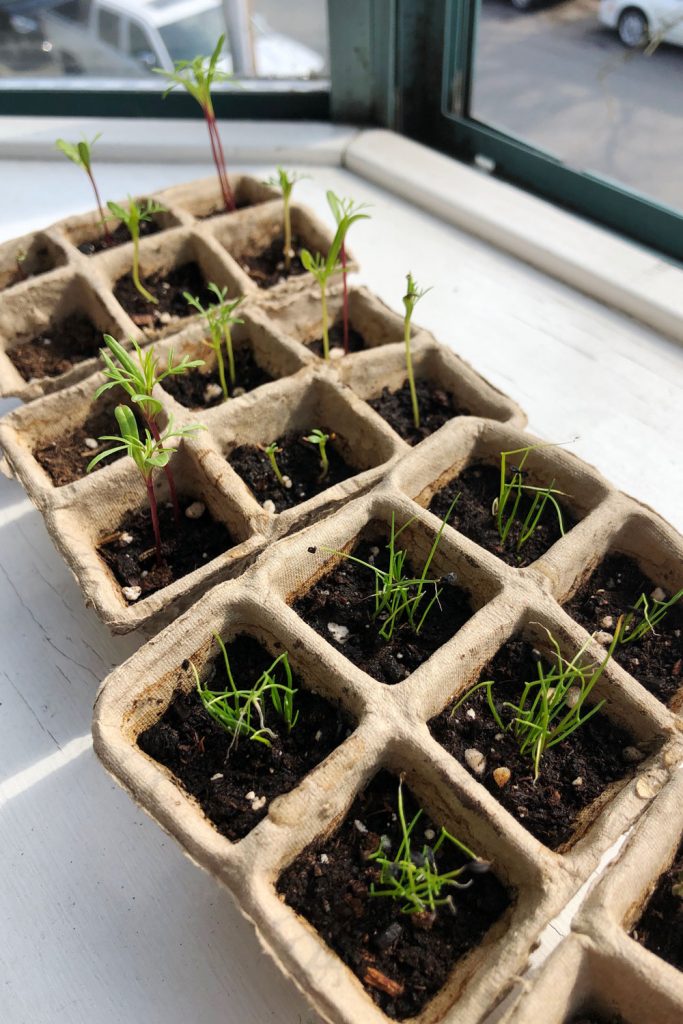
- Seed leaves: are the first two little leaves that emerge immediately after germination—these typically don’t look like what most of the plants’ mature leaves usually look like and often fall off once the plant starts growing! They basically serve to fuel and the little germinating plant as it first pops out of the soil.
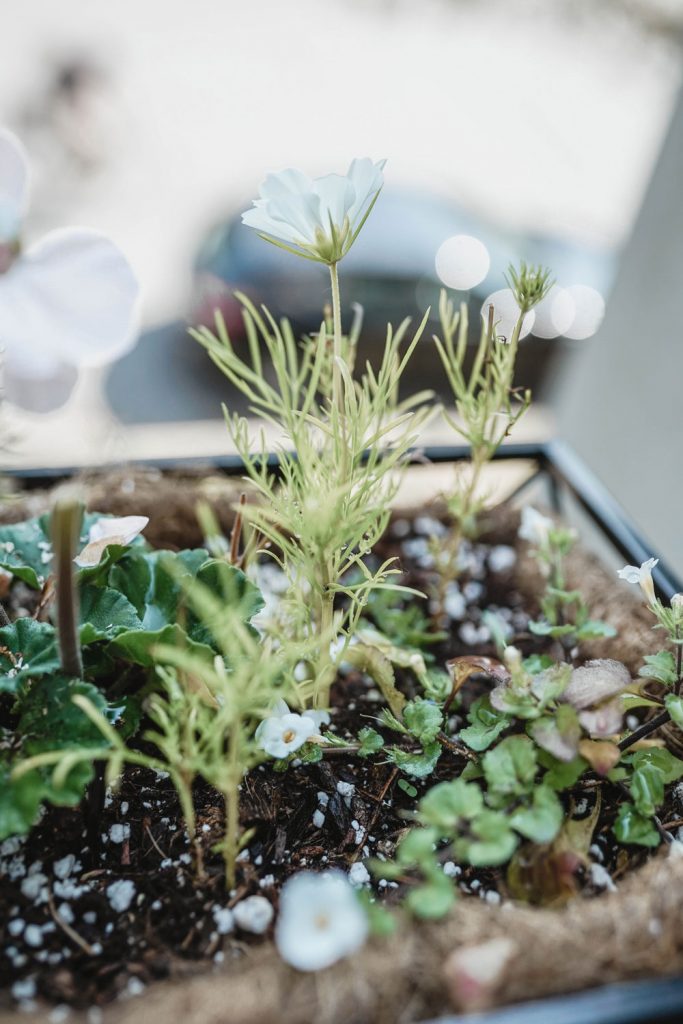
- True leaves: as its name suggests, these are the first “true” plant leaves that will emerge above the seed leaves. You can see in the below pic my cosmos seedlings (which are now those big daisy lookalikes – they’re the ones above the chives to the left) have both their seed leaves (those flat ones closer to the base) and a pair of true leaves (the fringed ones), which is what they grow in abundance now.
- Transplanting: this is taking a seeding and transplanting it to a new site or container. You need to take good care of your plant at this stage because some plants can go into transplant shock. Having said that, transplanting is a very good thing for your plant—it gives them the space to grow and really establish themselves so that like a human, they can start being a bit more self-sufficient! I find it’s best to do this after the seedlings have at least two pairs of true leaves.
- Direct sowing: this means planting seeds directly where you’re going to grow them (i.e. you won’t be repotting it once it turns into a seedling, see the sunflowers below!), which allows you to bypass transplanting altogether. While you can technically do this with any seeds, it’s best done after the last frost (see below) if planting outdoors, and there are even some plants that you can grow indoors which actually need to be directly sown (like dill) because they don’t like being transplanted. It will almost always say exact planting directions on your seed packet to make things easy so don’t worry about having to figure it out on your own.
- Last frost: both the last frost and first frost are important to keep in mind when it comes to any outdoor containers/plants you have. All it means is the last day you have frost (so for us in Vancouver, it was mid-April) and the first frost is the first day of the year that you get frost. You don’t want to sow seeds or transplant seedlings until the last frost has passed (which is different depending on where you’re based), and when the first frost is approaching, you’ll want to prep your plants. Which leads to…
- Overwintering: basically a couple simple steps to allow your perennials (which means they come back year after year, as opposed to the aptly named annuals) to grow back and thrive again the next year. Think of it as your plant going into hibernation—it usually involves cutting back so that your plant’s lower to the ground (meaning it can conserve its energy towards its roots instead of extending it to its outer leaves/steps), adding some mulch or top soil, etc. It’s a super easy process but critical, something we learned the hard way when we didn’t cut back our lavender last year! We had to replace it altogether.
- Deadheading: a super easy way of pruning back wasted or wilted flowers to allow for reblooming. I’ve deadheaded my cosmos and they’ve already rebloomed 2 times, and we’re already in May! It makes your blooming period last longer.
Tips For Urban Gardening
I have a whole checklist below because really the most important thing is just rounding up what you need and then putting yourself to the task, but if I had some general tips, they would be:
For growing from seed, get a bottom heater & a seed starter mix!
Not all plants need bottom heating to germinate but it makes a big difference for those that benefit from it and it really speeds up the process (plus they’re super small so will fit easily even in a tiny apartment). Growing from seed is a really cool process so if you want to try it out, get a bottom heat mat on Amazon (around $20) and watch your little seedlings sprout up! A seed starter mix is basically exactly what it sounds: a soil mix that gives seeds the nutrients they need to germinate.
Use a spray bottle for smaller or more delicate plants
Pouring water from a watering can drown your delicate baby seedlings—a mist will provide enough water and you have more control about where you aim it! Of course, once pants are really established and bigger it’s totally fine to use a watering can but a spray bottle is key, not only for seedlings but also for seeds (since a lot of seeds have to be at a specific depth to germinate, i.e. a few mm to 1 cm under the soil line and a watering can will burrow them too far into the soil).
Herbs and houseplants are an easy bet if you’re a newbie
If you’re feeling really hesitant about taking on anything too ambitious, start with a herb garden—it’ll train you up on different watering needs (dill doesn’t love too much dampness, whereas chives need more watering), you can harvest them year-round and they’re a bit more forgiving. If I leave my herbs for a weekend trip, they always bounce back really easily (though honestly, most plants will—they’re really resilient!). And houseplants are also incredibly easy – it’s pretty hard to kill a snake plant, for instance!
Avoid overwatering by testing dampness
The biggest mistake I’ve made in the past is that I’ve either just watered every day for fear of letting the plant dry out or taken the plant instructions way too literally (on those little cards that come with potted plants). While the latter offers a good general rule-of-thumb, everyone’s space is different—both inside and outside we get a ton of sun and our apartment heats up like crazy, so rather than following a “once a week” rule for something like kalanchoe, I just put my finger in the soil and check just past my first knuckle—it doesn’t need to be wet, but if it’s totally dry then it’s definitely time to water. Because of the way our space is in the summer, I have to water way more frequently than the recommendation, whereas in the winter I can taper way back – it’s all about just testing it instead of trying to make a guess at a glance!
Bottom water for smaller potted plants
Speaking of watering, this is my favourite way of watering for a few different reasons: it doesn’t drain out any soil nutrients by watering from the top, it allows for more control in watering and it means that water won’t pool at the base of a pot (which can lead to root rot), plus it hydrates your plants from the roots, which can sometimes get missed if you’re watering from the top and the water doesn’t make its way down. All you have to do is grab a container (I have a couple designated tupperware containers for this), fill it with enough water that when you put your pot in, the water level is about halfway up your pot. I usually set a timer for 10 minutes and then check the top—usually that’s enough time for the moisture to work its way to the top of the soil but if it still feels dry (using that same method mentioned above of checking at the first knuckle) then allow for more time. Some plants are especially thirsty so you may need to refill if it’s drinking it all up! Usually I can only do up to an 8-inch pot with this but have been known to fill our sink to get in our bigger houseplants like the money tree or snake plant!
Know when to size up
It’s important to repot as your plant grows—the snake plant I got about 8 months ago or so was a teeny tiny thing when I first got it (I kept it on our coffee table) and is now quickly turning into a behemoth. The thing that really helped it grow was taking it out of the 6 inch pot that it was literally exploding out of and putting it into about a 15 inch pot—this ensures that your plant doesn’t get “root-bound” and has the space to really grow. While you can’t really hurt a plant by putting it in a too-big pot, for the sake of space you can just scale up as needed over time. Plastic insert pots are pretty cheap so don’t let cost deter you as it’s super economical to buy new ones as needed, plus you can keep the smaller ones for sizing up seedlings!
When a seedling becomes a plant
This was a tricky one for me to figure out but after doing a lot of trial and research, I’ve found that taking your seedling from a seedling cell to a small pot (speaking of sizing up) is best done when they have their second set of true leaves, as I mentioned a bit earlier. You just need some little 3-4 inch pots for this as they do still need a bit of babying still after their first transplant but this is when you help the plant establish itself before repotting into a planter or even into the ground.
Soil is key
In general, plants need 3 things to grow: sun, water and nutrients in the soil. It’s important to pick the right type of soil depending on the plant so that it gets the nutrients it needs. It’ll pretty much always say on your packet of seeds or on the plant card (or you can just ask for help at your garden centre), but think of any warm-weather, indoor plants like snake plants, money trees, etc as requiring indoor container soil, whereas most outdoor plants (particularly ones that require a bit more moisture/water) will want a good outdoor container soil. Speaking of nutrients, have a good fertilizer that you can add to your watering mixture periodically – it varies by plant but typically I do every other week and just give a diluted mixture. It just gives your plants a boost!
your essential gardening checklist
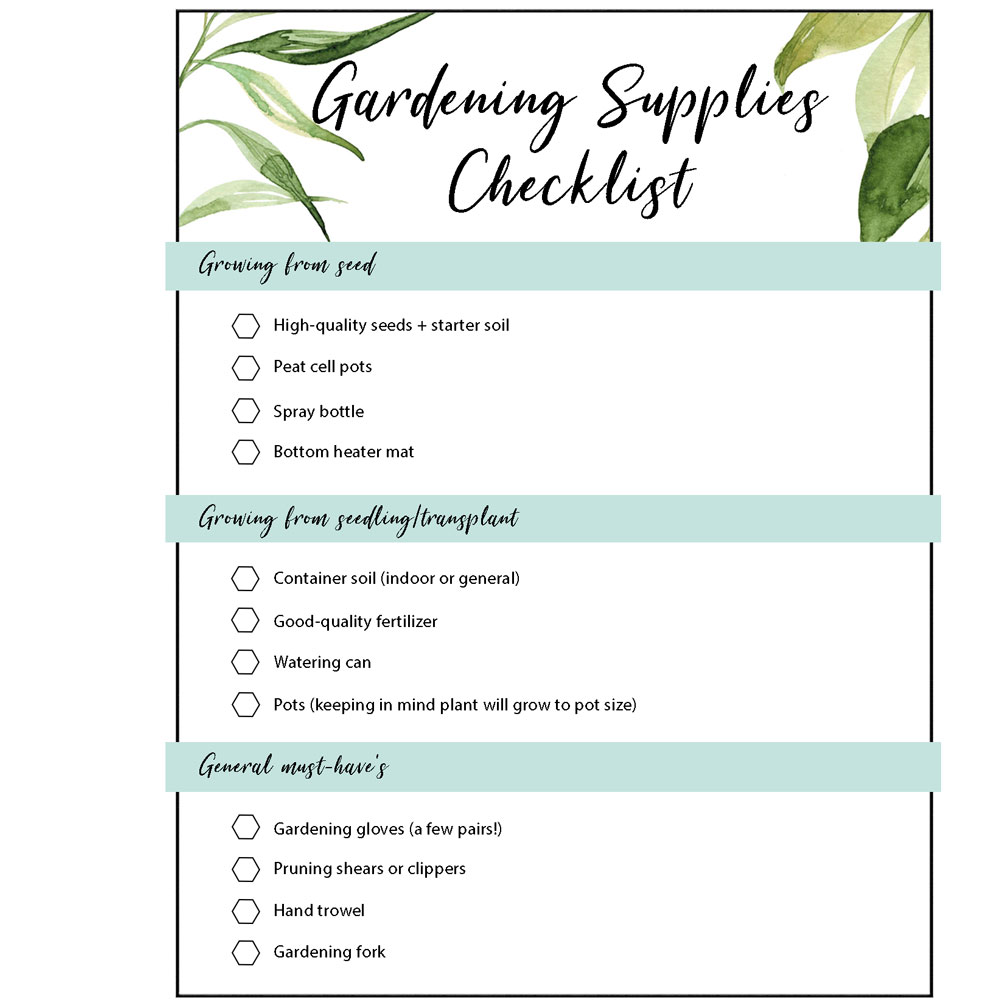
Okay I don’t want to overload you guys so that’s where I’ll leave it with some beginner tips! I have a checklist above that you can pin for future reference or print off now to get shopping (and plant growing)!
What have your experiences been with gardening so far? I want to hear! Tell me in the comments below.
pin me

I love gardening! Just bought some new stuff for me new house 🙂
Brianna | http://briannamarielifestyle.com/
Hi Sweetie,
your plants look so good! Ready for summer ♥ I am so, so bad at gardening lol
I managed it to murder a cactus 😮 I really love plants, but unfortunately they don’t survive with me as theire plant-mother 🙁
Have a nice week ♥
https://nouw.com/be_creative